
In this guide
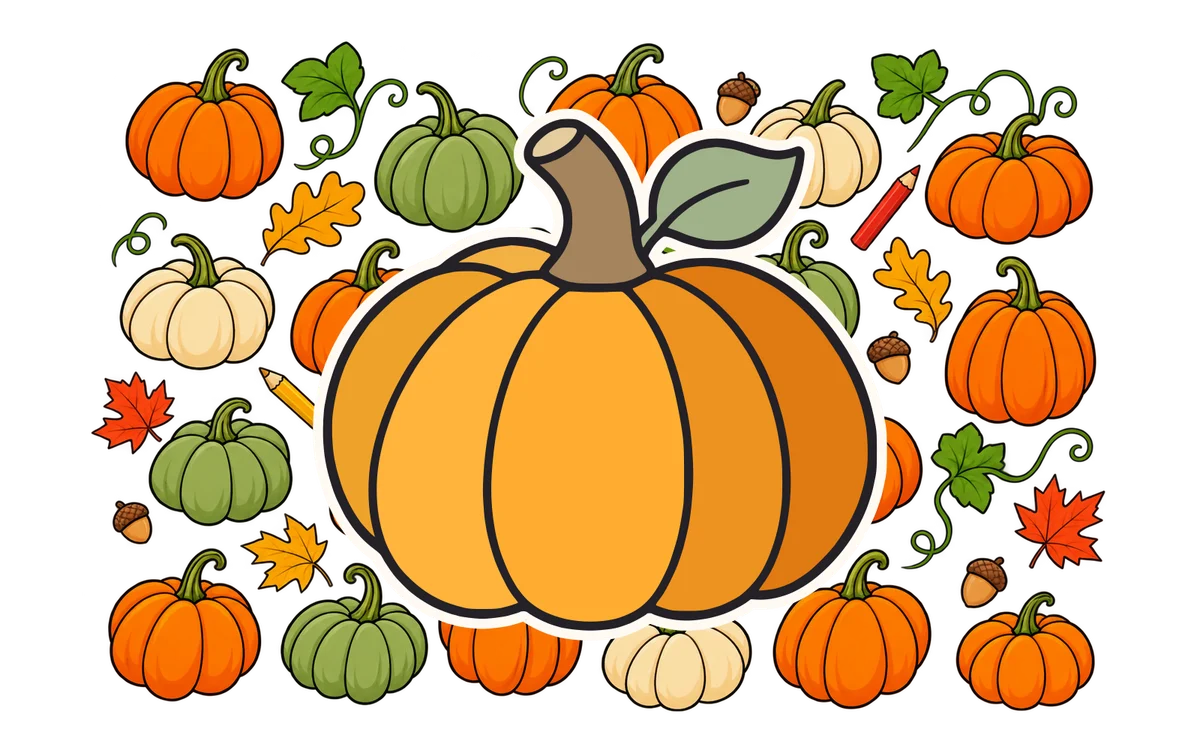

A broad orange harvest pumpkin with a curved stem and one leaf, surrounded by smaller orange, cream and green pumpkin doodles.
This easy pumpkin drawing starts with one rounded middle bulge. Neighboring ribs curve around it, a short bent stem rises from the top, and one broad leaf finishes the outline. It is a plain harvest pumpkin, so you can use it for an autumn sketch, a Thanksgiving activity or a small picture on a card.
The Detailed guide has 22 small actions, including placing and erasing a light oval. Each action has a whole-drawing view and a closer view. The seven-stage Quick guide combines those actions into larger checkpoints. Both use the same finished pumpkin, blank outline and optional colored reference.
Make room for a rounded pumpkin
Use a pencil, an eraser and plain paper. Begin with the light oval near the middle of your paper, leaving space above for the stem and to both sides for more pumpkin. The oval marks only the central bulge: the finished fruit will be considerably wider.
Look at the finished outline before starting. The front bulge is broad and tall. The curves beside it make narrower sections, and the outermost curves tuck behind those sections. The stem bends to one side instead of standing like a straight rectangle. You do not need to make the left and right sides identical.
Keep the first marks light enough to erase. Follow the solid curves in the guide rather than repeatedly tracing the dashed oval. In step 7, remove that oval and keep the solid middle outline. No dashed guides remain in the finished drawing or coloring sheet.
Draw the pumpkin
Build the broad central bulge first, then curve the neighboring ribs around it. The stem and one leaf finish the same plain pumpkin used in the Thanksgiving coloring pack.
Detailed guide
Draw lightly in pencil. Dark plum shows the lines to add; gray shows earlier work. Begin with the pale dashed oval, then erase it in step 7. The whole view shows placement; the closer view makes the current curve easier to see.
PDFs open in a new tab. The Detailed pack has 10 pages: eight teaching pages, a blank outline and a final color reference.
Step 1 of 22
Place a light oval
Draw a very light tall oval for the middle bulge. It is a placement guide, not part of the finished outline. Leave room above for the stem and to both sides for more pumpkin.
Whole drawing
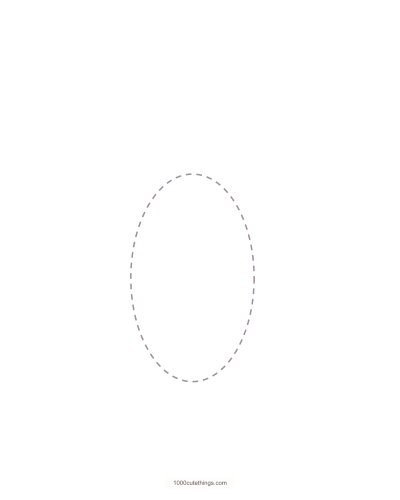
Step 1, whole drawing: Draw a very light tall oval for the middle bulge. It is a placement guide, not part of the finished outline. Leave room above for the stem and to both sides for more pumpkin.
This step, closer
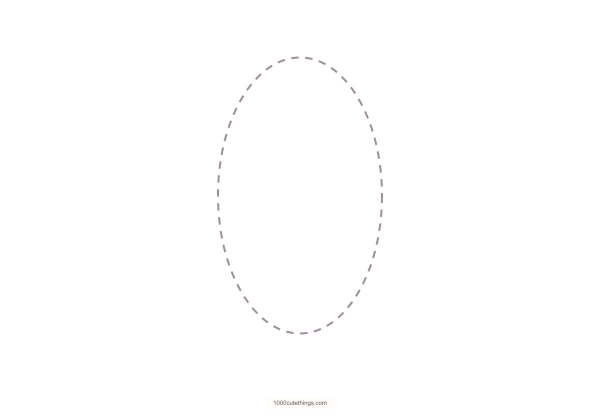
Step 1, closer: Draw a very light tall oval for the middle bulge. It is a placement guide, not part of the finished outline. Leave room above for the stem and to both sides for more pumpkin.
Step 2 of 22
Curve the upper left side
Start near the oval's upper left. Curve outward and down to the widest part of the middle bulge, following the dark line.
Whole drawing
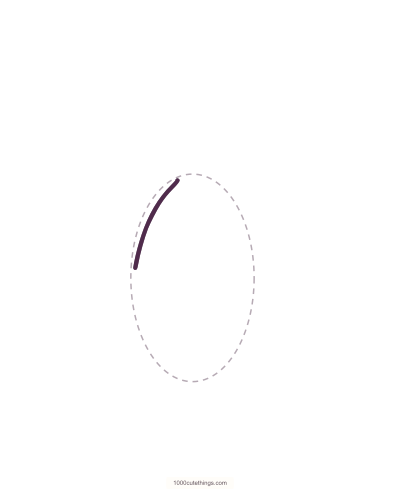
Step 2, whole drawing: Start near the oval's upper left. Curve outward and down to the widest part of the middle bulge, following the dark line.
This step, closer
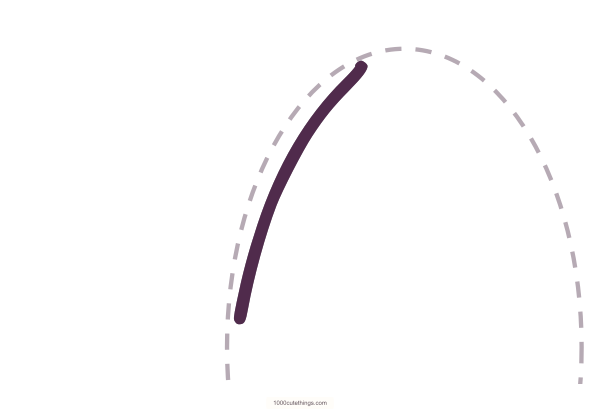
Step 2, closer: Start near the oval's upper left. Curve outward and down to the widest part of the middle bulge, following the dark line.
Step 3 of 22
Round its lower left
Continue the same curve down, then turn gently right around the bottom. Stop near the middle of the base.
Whole drawing
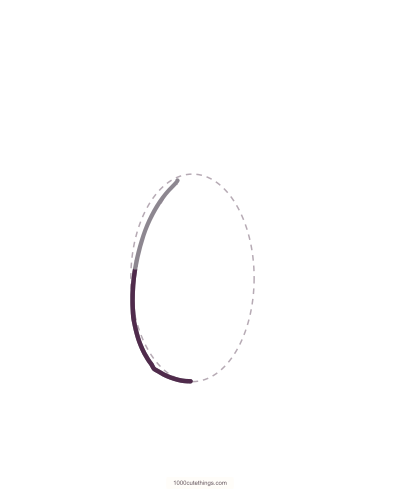
Step 3, whole drawing: Continue the same curve down, then turn gently right around the bottom. Stop near the middle of the base.
This step, closer
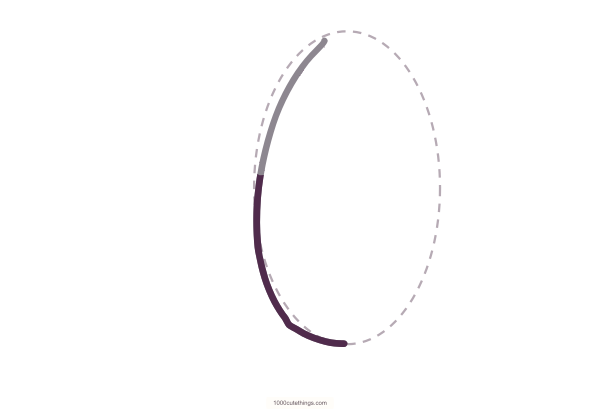
Step 3, closer: Continue the same curve down, then turn gently right around the bottom. Stop near the middle of the base.
Step 4 of 22
Curve the upper right side
Start near the oval's upper right and bow outward. Keep this curve opposite the first side, leaving a broad space between them.
Whole drawing
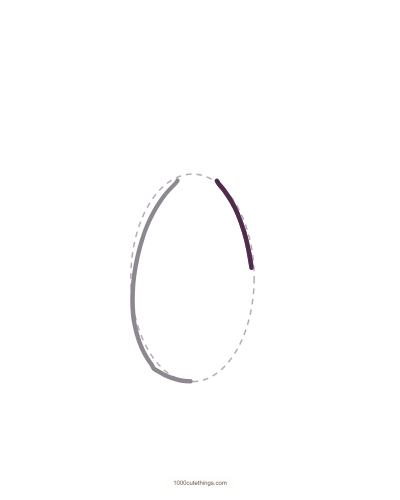
Step 4, whole drawing: Start near the oval's upper right and bow outward. Keep this curve opposite the first side, leaving a broad space between them.
This step, closer
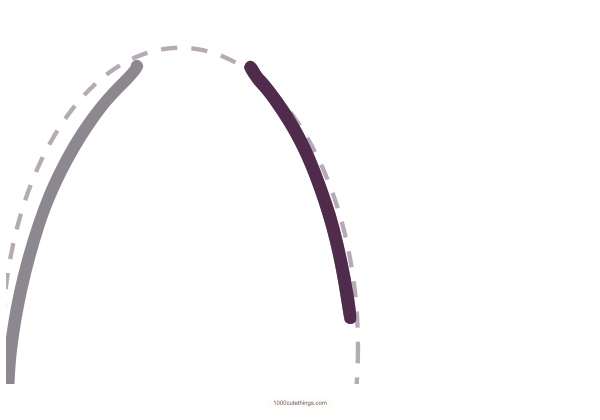
Step 4, closer: Start near the oval's upper right and bow outward. Keep this curve opposite the first side, leaving a broad space between them.
Step 5 of 22
Join the rounded bottom
Continue down the right side and turn left around the base to meet the earlier bottom curve. The two sides now form one open-topped bulge.
Whole drawing
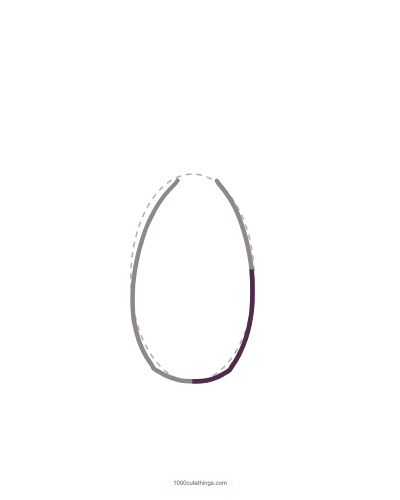
Step 5, whole drawing: Continue down the right side and turn left around the base to meet the earlier bottom curve. The two sides now form one open-topped bulge.
This step, closer
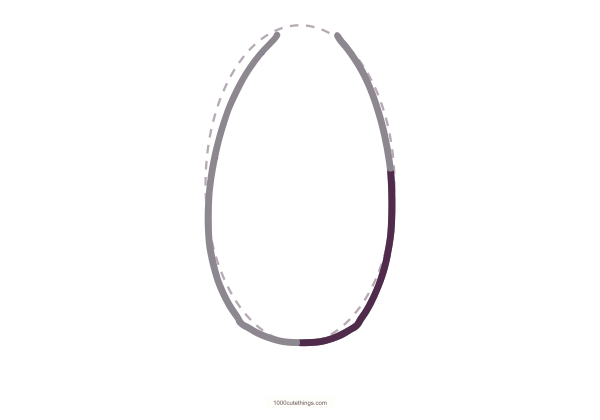
Step 5, closer: Continue down the right side and turn left around the base to meet the earlier bottom curve. The two sides now form one open-topped bulge.
Step 6 of 22
Close the shallow top
Join the two upper ends with a short, shallow curved top. Its center is the lower rim of the stem that you will draw later.
Whole drawing
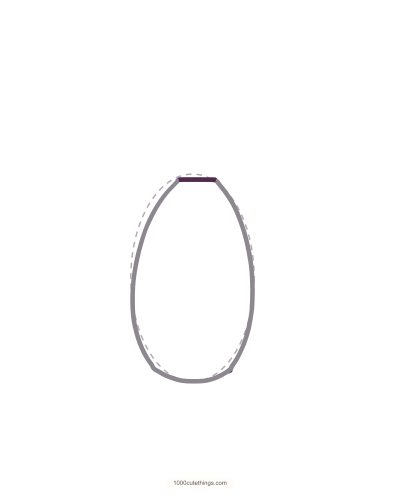
Step 6, whole drawing: Join the two upper ends with a short, shallow curved top. Its center is the lower rim of the stem that you will draw later.
This step, closer
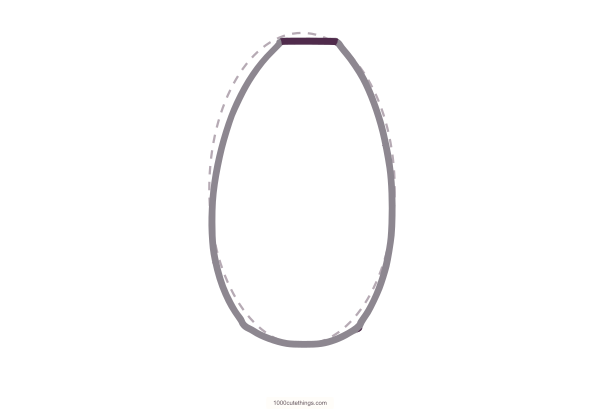
Step 6, closer: Join the two upper ends with a short, shallow curved top. Its center is the lower rim of the stem that you will draw later.
Step 7 of 22
Erase the light oval
Erase only the pale placement oval. Keep the solid outline of the middle bulge, including its shallow top and rounded bottom.
Whole drawing
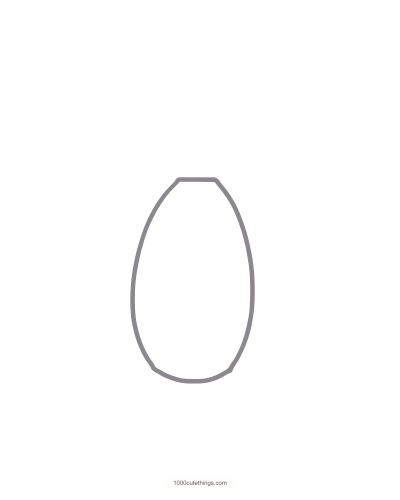
Step 7, whole drawing: Erase only the pale placement oval. Keep the solid outline of the middle bulge, including its shallow top and rounded bottom.
This step, closer
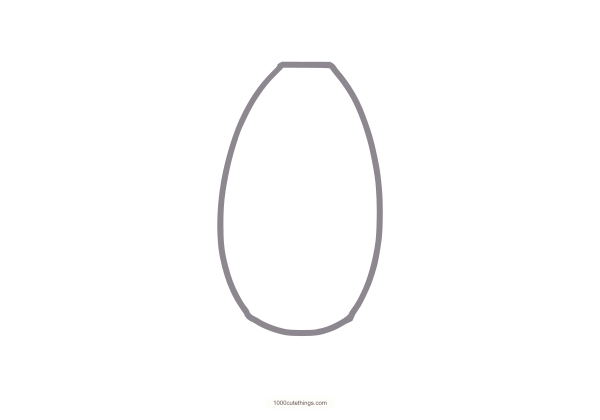
Step 7, closer: Erase only the pale placement oval. Keep the solid outline of the middle bulge, including its shallow top and rounded bottom.
Step 8 of 22
Bow a rib to the left
From just left of the middle bulge's top, curve a new rib outward to the left and down. Stop beside the lower part of the middle bulge.
Whole drawing
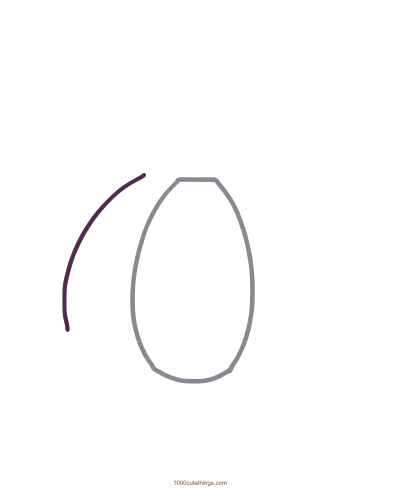
Step 8, whole drawing: From just left of the middle bulge's top, curve a new rib outward to the left and down. Stop beside the lower part of the middle bulge.
This step, closer
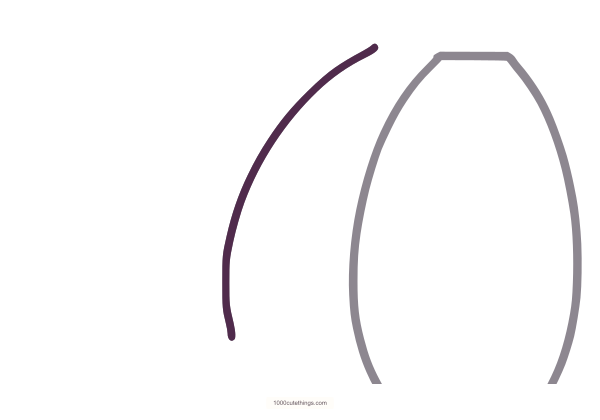
Step 8, closer: From just left of the middle bulge's top, curve a new rib outward to the left and down. Stop beside the lower part of the middle bulge.
Step 9 of 22
Round the left rib's base
Curve from the lower end of that rib to the middle bulge's lower left join. Keep this base rounded rather than pointed.
Whole drawing
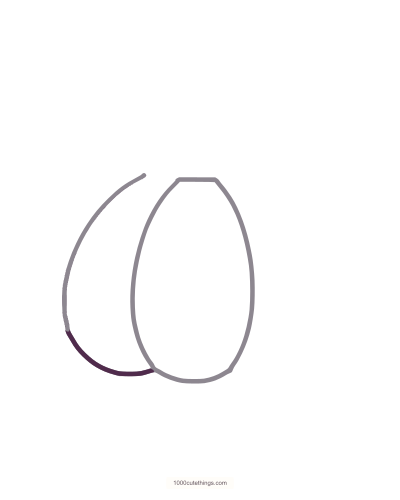
Step 9, whole drawing: Curve from the lower end of that rib to the middle bulge's lower left join. Keep this base rounded rather than pointed.
This step, closer
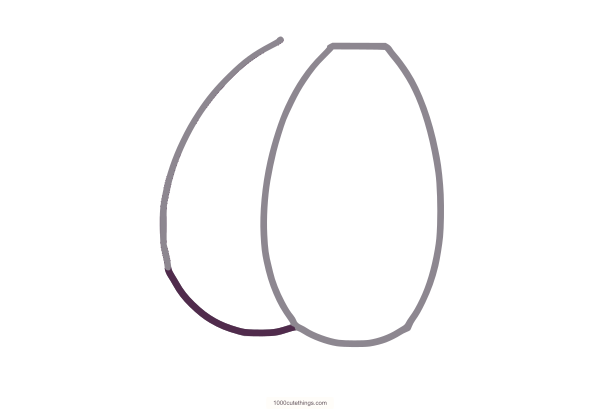
Step 9, closer: Curve from the lower end of that rib to the middle bulge's lower left join. Keep this base rounded rather than pointed.
Step 10 of 22
Join its short top
Add the short upper curve between that left rib and the top of the middle bulge. This closes the neighboring pumpkin section.
Whole drawing
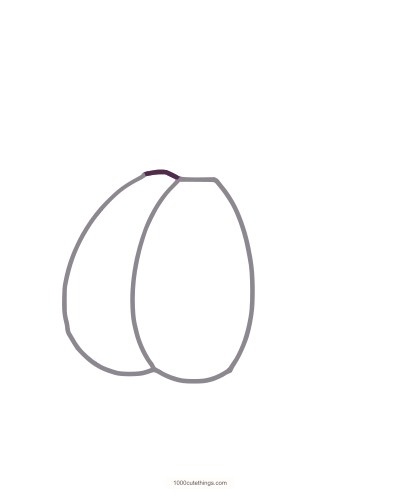
Step 10, whole drawing: Add the short upper curve between that left rib and the top of the middle bulge. This closes the neighboring pumpkin section.
This step, closer
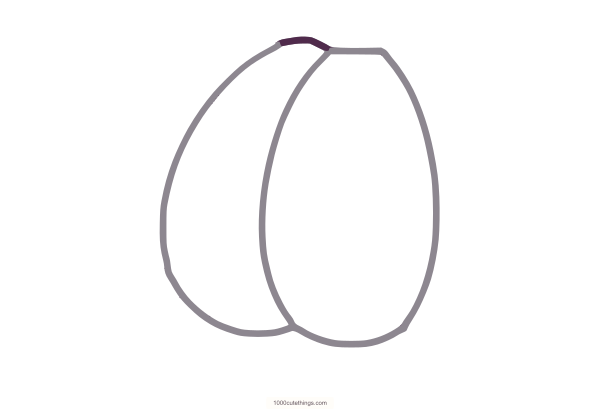
Step 10, closer: Add the short upper curve between that left rib and the top of the middle bulge. This closes the neighboring pumpkin section.
Step 11 of 22
Add the outer left shoulder
From the top of the left rib, sweep a short shoulder farther left. Turn around the outside of the pumpkin and curve down to its widest left edge.
Whole drawing
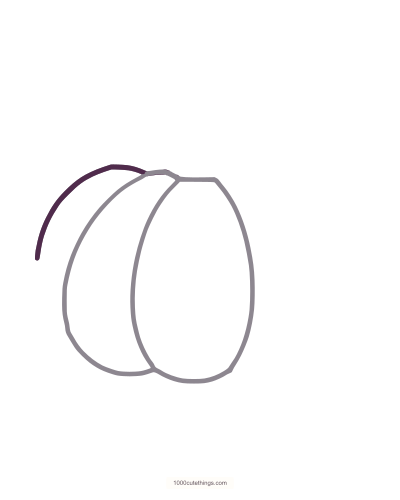
Step 11, whole drawing: From the top of the left rib, sweep a short shoulder farther left. Turn around the outside of the pumpkin and curve down to its widest left edge.
This step, closer
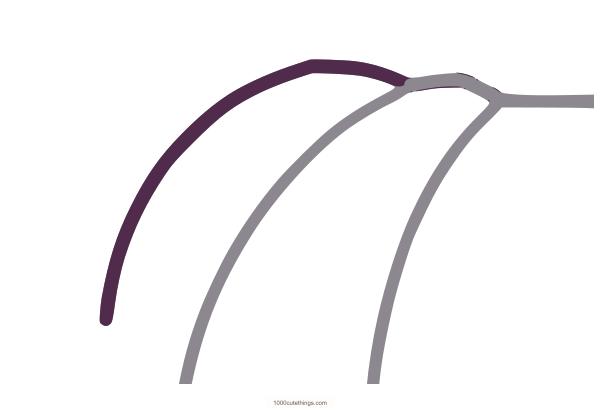
Step 11, closer: From the top of the left rib, sweep a short shoulder farther left. Turn around the outside of the pumpkin and curve down to its widest left edge.
Step 12 of 22
Close the outer left curve
Continue around the lower left side and meet the earlier rib. This narrow outer section sits behind the broader left section.
Whole drawing
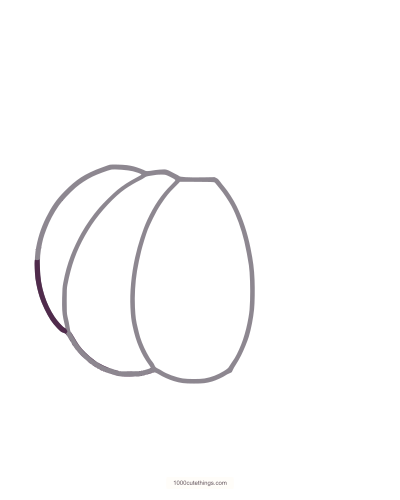
Step 12, whole drawing: Continue around the lower left side and meet the earlier rib. This narrow outer section sits behind the broader left section.
This step, closer
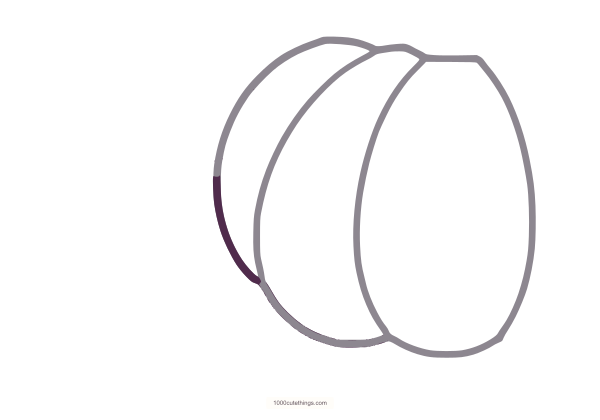
Step 12, closer: Continue around the lower left side and meet the earlier rib. This narrow outer section sits behind the broader left section.
Step 13 of 22
Add the small rear shoulder
Draw a shallow hump above the left shoulder, stopping near the stem position. Keep it smaller than the pumpkin sections below it.
Whole drawing
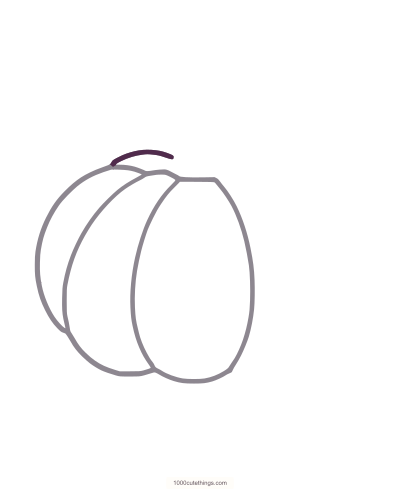
Step 13, whole drawing: Draw a shallow hump above the left shoulder, stopping near the stem position. Keep it smaller than the pumpkin sections below it.
This step, closer
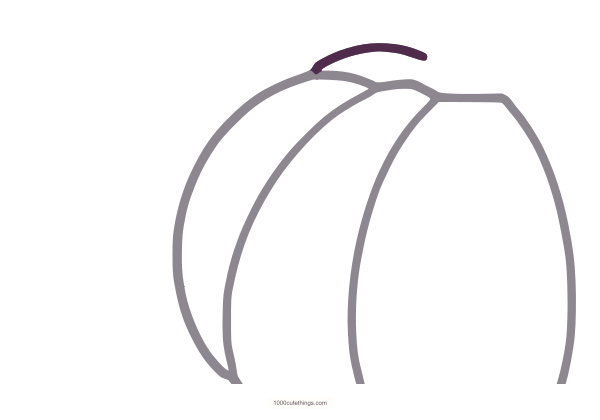
Step 13, closer: Draw a shallow hump above the left shoulder, stopping near the stem position. Keep it smaller than the pumpkin sections below it.
Step 14 of 22
Bow a rib to the right
From the upper right of the middle bulge, curve a new rib outward and down. Let its rounded shape echo the left rib.
Whole drawing
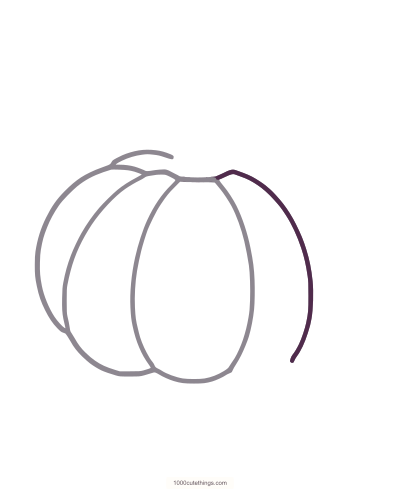
Step 14, whole drawing: From the upper right of the middle bulge, curve a new rib outward and down. Let its rounded shape echo the left rib.
This step, closer
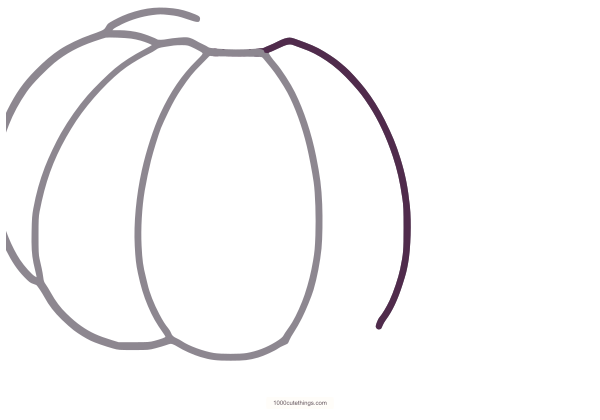
Step 14, closer: From the upper right of the middle bulge, curve a new rib outward and down. Let its rounded shape echo the left rib.
Step 15 of 22
Round the right rib's base
Join that rib's lower end to the middle bulge's lower right join with a short rounded base.
Whole drawing
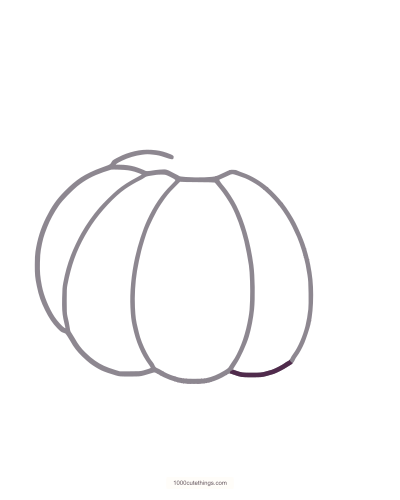
Step 15, whole drawing: Join that rib's lower end to the middle bulge's lower right join with a short rounded base.
This step, closer
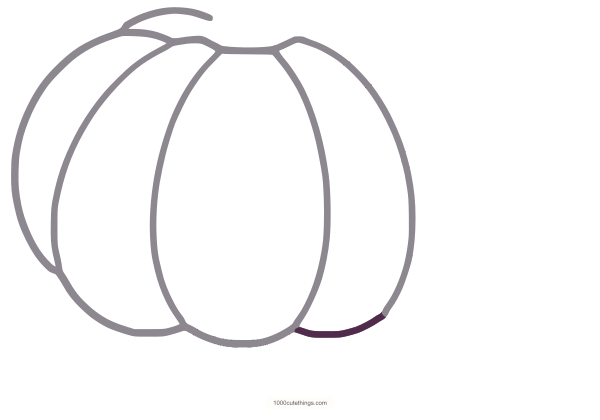
Step 15, closer: Join that rib's lower end to the middle bulge's lower right join with a short rounded base.
Step 16 of 22
Add the outer right shoulder
Sweep out from the top right, then round down the pumpkin's outer edge. Make this outer section narrower than the neighboring rib.
Whole drawing
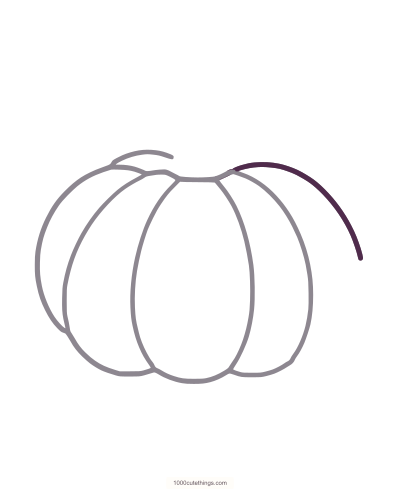
Step 16, whole drawing: Sweep out from the top right, then round down the pumpkin's outer edge. Make this outer section narrower than the neighboring rib.
This step, closer
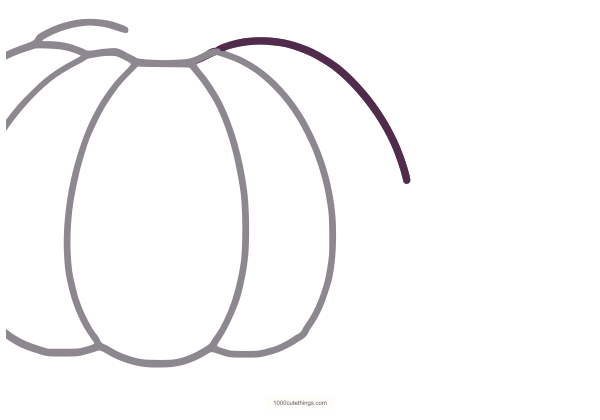
Step 16, closer: Sweep out from the top right, then round down the pumpkin's outer edge. Make this outer section narrower than the neighboring rib.
Step 17 of 22
Close the outer right curve
Continue the outside curve down and back toward the right rib's base. Join it cleanly without extending a loose tail.
Whole drawing
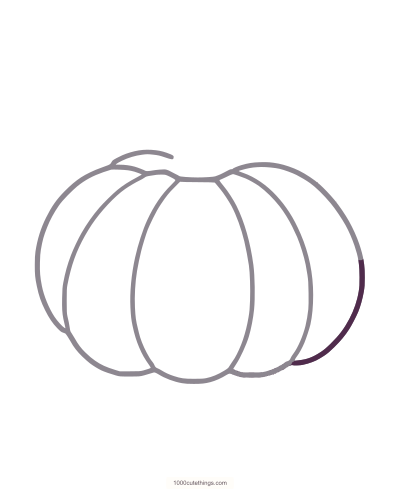
Step 17, whole drawing: Continue the outside curve down and back toward the right rib's base. Join it cleanly without extending a loose tail.
This step, closer
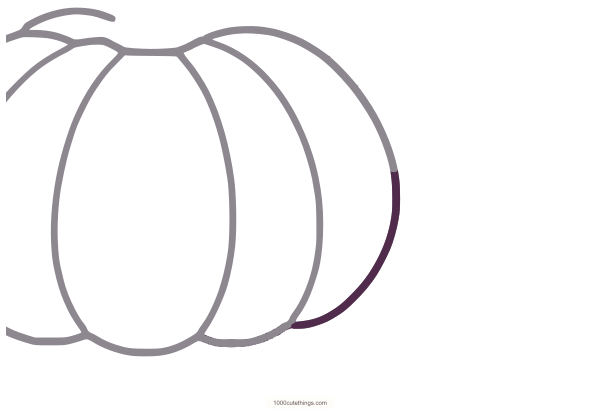
Step 17, closer: Continue the outside curve down and back toward the right rib's base. Join it cleanly without extending a loose tail.
Step 18 of 22
Lift the stem's left edge
From the top of the pumpkin, curve the left stem edge upward. Bend it left near the top, leaving room for a small cut end.
Whole drawing
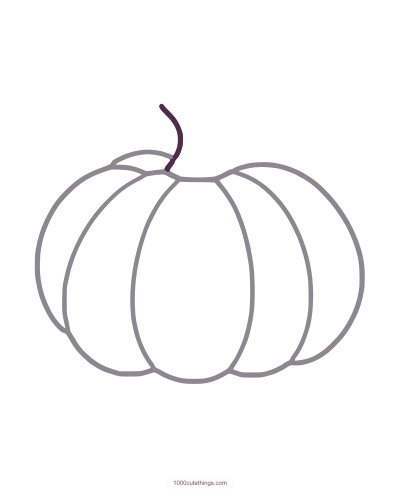
Step 18, whole drawing: From the top of the pumpkin, curve the left stem edge upward. Bend it left near the top, leaving room for a small cut end.
This step, closer
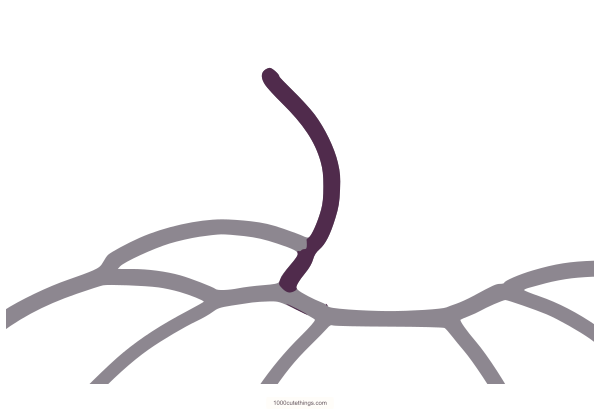
Step 18, closer: From the top of the pumpkin, curve the left stem edge upward. Bend it left near the top, leaving room for a small cut end.
Step 19 of 22
Close the stem's cut end
Draw one complete tilted oval at the upper end of the stem. Keep the white center enclosed by a continuous rim.
Whole drawing
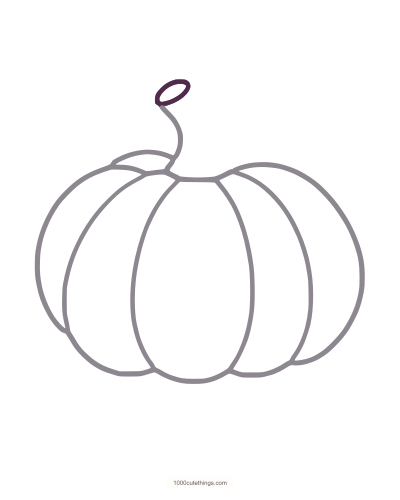
Step 19, whole drawing: Draw one complete tilted oval at the upper end of the stem. Keep the white center enclosed by a continuous rim.
This step, closer
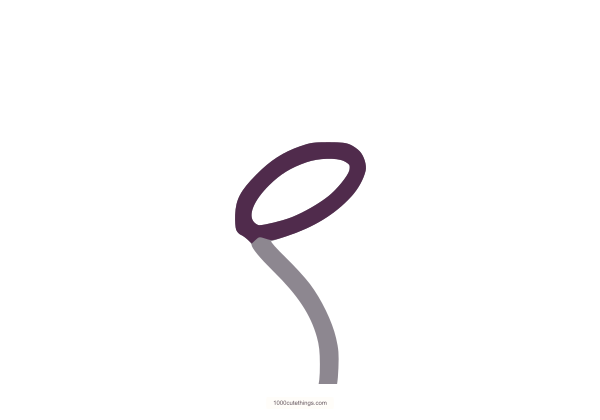
Step 19, closer: Draw one complete tilted oval at the upper end of the stem. Keep the white center enclosed by a continuous rim.
Step 20 of 22
Return down the stem
From the oval's right edge, curve down the other side of the stem and join the pumpkin's shallow top. The stem broadens near its base.
Whole drawing
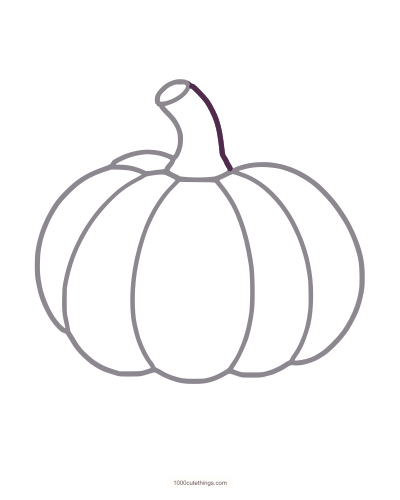
Step 20, whole drawing: From the oval's right edge, curve down the other side of the stem and join the pumpkin's shallow top. The stem broadens near its base.
This step, closer
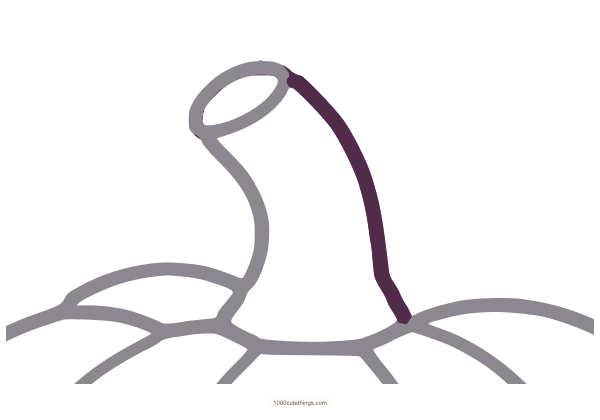
Step 20, closer: From the oval's right edge, curve down the other side of the stem and join the pumpkin's shallow top. The stem broadens near its base.
Step 21 of 22
Outline one broad leaf
From the stem's right side, curve up around a broad leaf, turn at its tip and return along its lower edge. Close the leaf near the stem.
Whole drawing
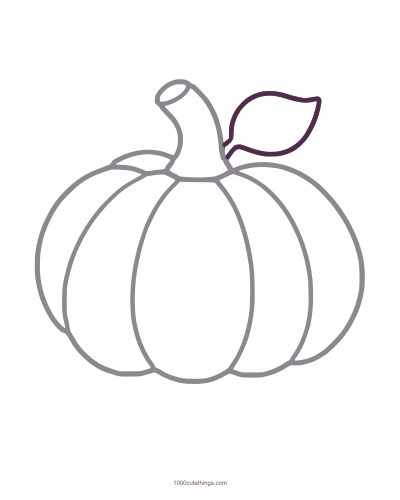
Step 21, whole drawing: From the stem's right side, curve up around a broad leaf, turn at its tip and return along its lower edge. Close the leaf near the stem.
This step, closer
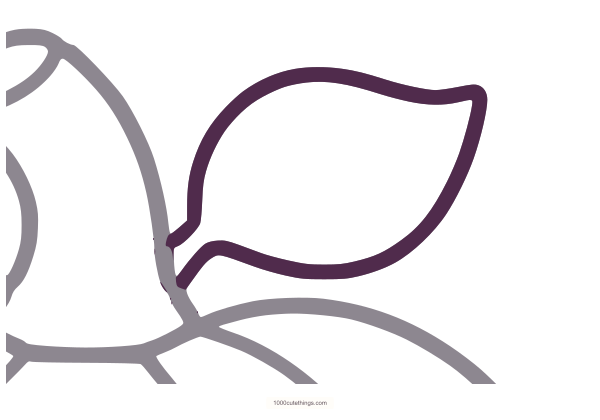
Step 21, closer: From the stem's right side, curve up around a broad leaf, turn at its tip and return along its lower edge. Close the leaf near the stem.
Step 22 of 22
Add the leaf vein
Draw one gently curving vein from the leaf's base toward its tip. Stop before the outer edge so the leaf stays open and simple.
Whole drawing
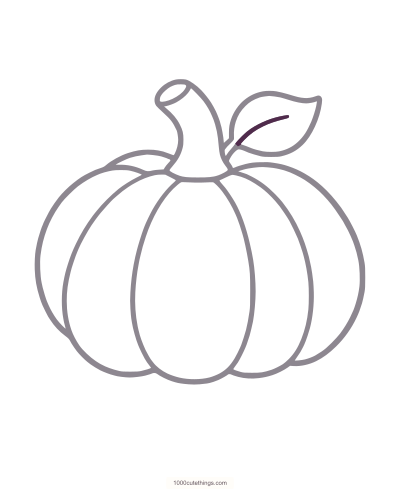
Step 22, whole drawing: Draw one gently curving vein from the leaf's base toward its tip. Stop before the outer edge so the leaf stays open and simple.
This step, closer
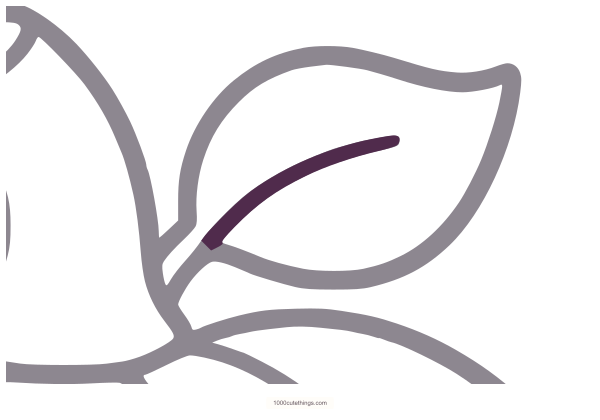
Step 22, closer: Draw one gently curving vein from the leaf's base toward its tip. Stop before the outer edge so the leaf stays open and simple.
Quick guide
Use these larger checkpoints when you want fewer pauses. They lead to the same pumpkin. Return to the Detailed guide for a curve, a join or the placement oval.
Show the seven-stage Quick guide and PDFs
PDFs open in a new tab. Each four-page Quick pack ends with the blank outline and matching colored reference.
Stage 1: Build the middle bulge
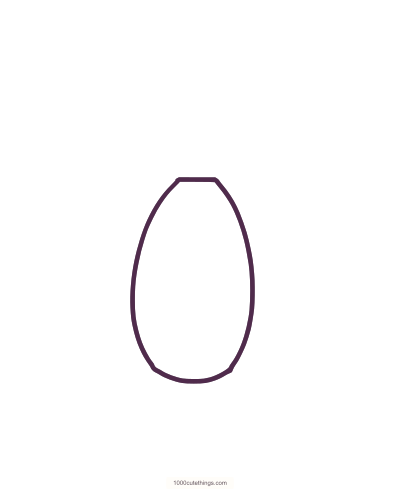
Quick stage 1: Use a light oval to place the middle bulge, build its rounded outline and shallow top, then erase the oval.
Use a light oval to place the middle bulge, build its rounded outline and shallow top, then erase the oval.
Stage 2: Add the left rib
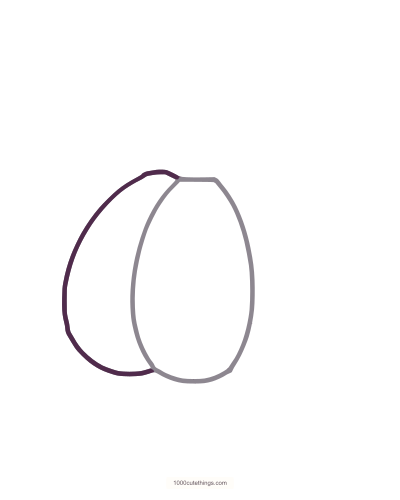
Quick stage 2: Bow a rib to the left, round its lower edge and close its short top.
Bow a rib to the left, round its lower edge and close its short top.
Stage 3: Round the outer left side
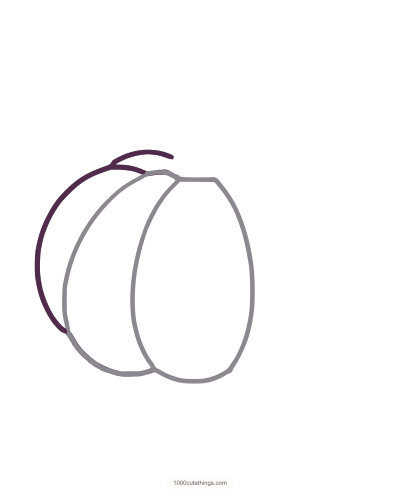
Quick stage 3: Add a narrower outer curve behind the left rib, then the small rear shoulder.
Add a narrower outer curve behind the left rib, then the small rear shoulder.
Stage 4: Build the right side
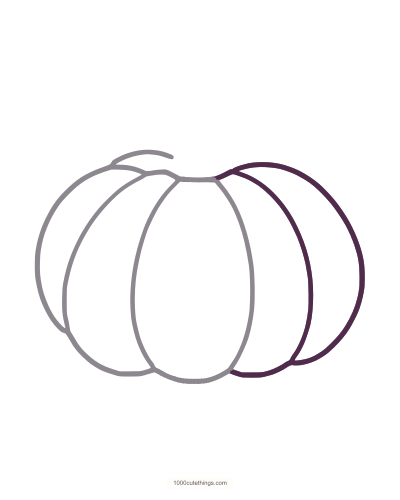
Quick stage 4: Curve the right rib, round its lower edge and close the narrower outside section.
Curve the right rib, round its lower edge and close the narrower outside section.
Stage 5: Draw the curved stem
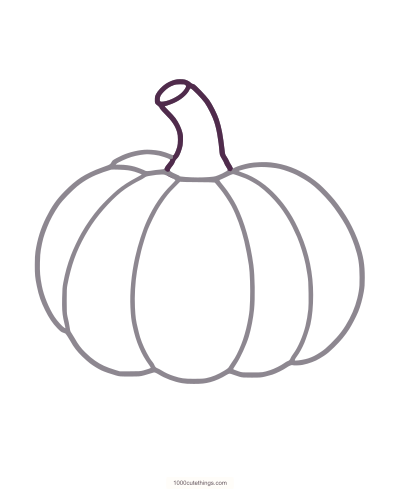
Quick stage 5: Lift the left stem edge, close its tilted oval end and return down the right edge.
Lift the left stem edge, close its tilted oval end and return down the right edge.
Stage 6: Close the broad leaf
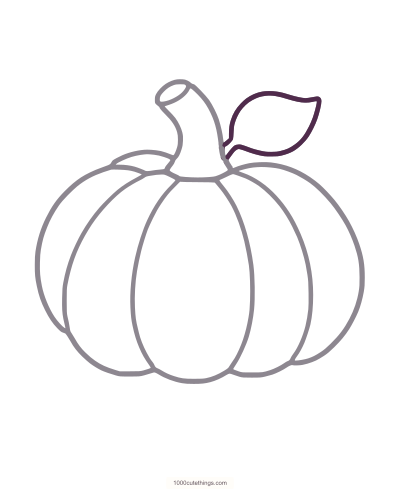
Quick stage 6: Curve around the broad leaf and close its lower edge near the stem.
Curve around the broad leaf and close its lower edge near the stem.
Stage 7: Add the leaf vein
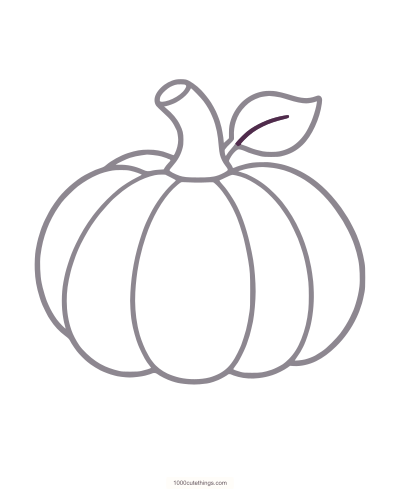
Quick stage 7: Draw one vein inside the leaf, stopping before its tip.
Draw one vein inside the leaf, stopping before its tip.
Keep the ribs rounded
If the pumpkin looks like a row of long narrow balloons, widen the spaces between the curves. The middle bulge needs room, and the adjacent curves should bow outward before turning back toward the base. Compare their widths in the whole view before strengthening a line.
Bring a lower curve into its shown join instead of extending it past the neighboring rib. A loose tail at the bottom can make two connected sections look like separate objects. The small rear shoulder on the left stays short; it sits above the larger body rather than becoming another full oval.
For the stem, check its two edges and tilted cut end separately. The left edge bends upward first. The small oval then makes a complete rim, and the returning right edge widens toward the pumpkin. Keep the leaf beside the stem, with its vein stopping inside the outer contour.
If a join needs correcting, erase the misplaced part while the pencil is still light. Use the closer view to compare the connection and the whole view to check whether the pumpkin still feels rounded.
Try one color idea
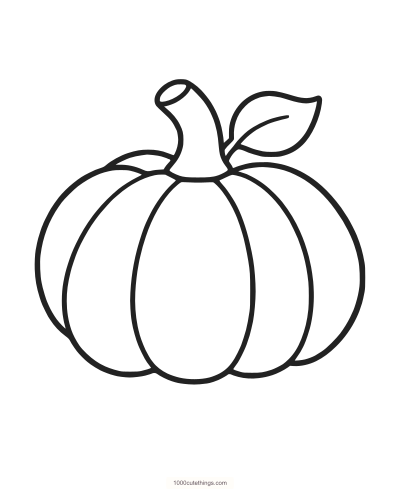
Finished blank pumpkin outline with rounded ribs, a curved stem and one broad leaf.
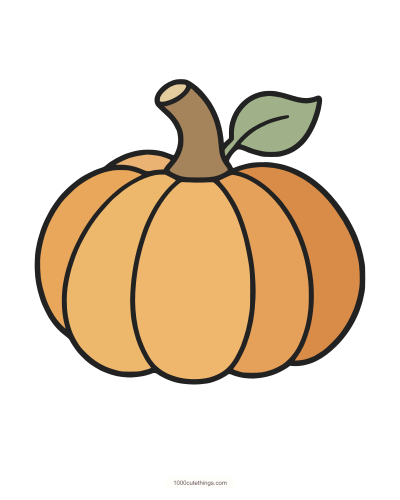
The same pumpkin contours in warm orange, with a brown stem and muted green leaf.
Try two neighboring orange shades across the ribs. The palette is optional; the broad middle bulge can stay lighter while the narrower sides use a deeper shade. Keep the stem and leaf distinct, and leave the cut end of the stem pale if you like.
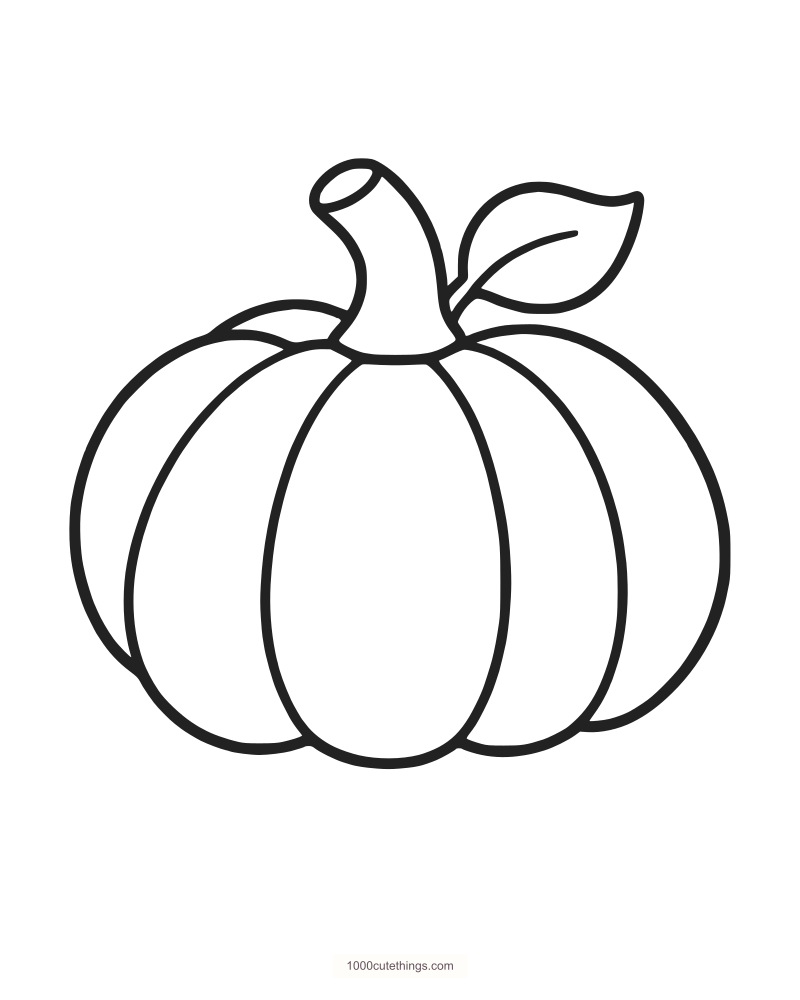
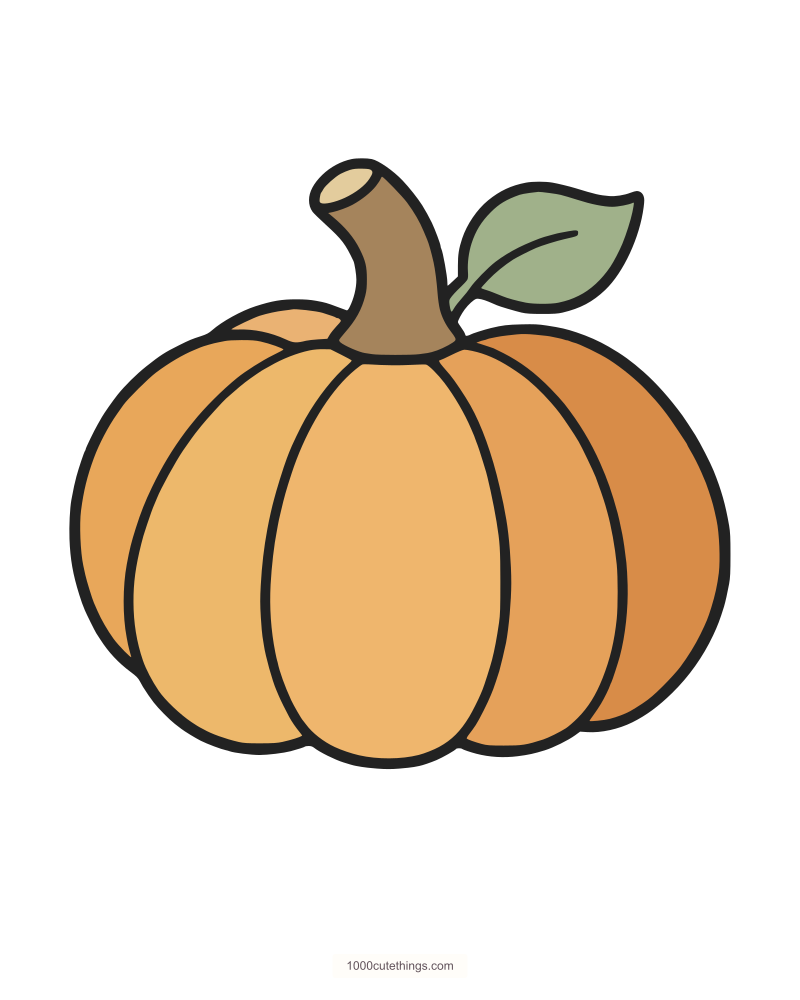
Once you understand the shape, draw a second pumpkin a little wider or shorter. Keep the stem attached and let the ribs follow that new form. A pale cream or green version gives you a different harvest palette without needing to add a face.
Print your drawing guide
Choose Detailed for all 22 actions with whole and closer views. Choose Quick for seven larger stages. Each A4 or US Letter guide ends with a full-page blank outline and the matching colored reference. The download links are beside each guide and open in a new tab.
Use the file that matches your paper. Check Actual size / 100% and the complete page in your printer preview before printing. If an edge is clipped, try fit-to-printable-area and inspect the preview again. You can print only the teaching pages or just the outline and color-reference pages you need.
For a single-page coloring PDF, the Thanksgiving coloring collection includes this exact harvest pumpkin, plus a turkey, leaves and acorns, pie, cranberries and a basket. The existing pumpkin-and-leaf picture in the main drawing collection remains a separate observation example with a curling tendril.
Choose another small drawing
Try the tulip lesson for long leaf curves or the seated frog for a rounded body with small hands and toes. The Christmas tree lesson uses a different structure: widening tiers, garlands and round baubles.
For a quiet seasonal activity after drawing, use the Thanksgiving facts and printable quiz cards. Keep your finished pumpkin beside a short autumn note, leaving room outside its stem and leaf for the words.